

This week’s Wedding Wednesday blog we are answering the questions from the Ask Anything post!! Thank you to those of you who submitted questions and congrats again to Katy for winning the Starbucks gift card!!! We had questions about photography and also about planning and we are going to try to answer them the best we can! So, let’s get started!!
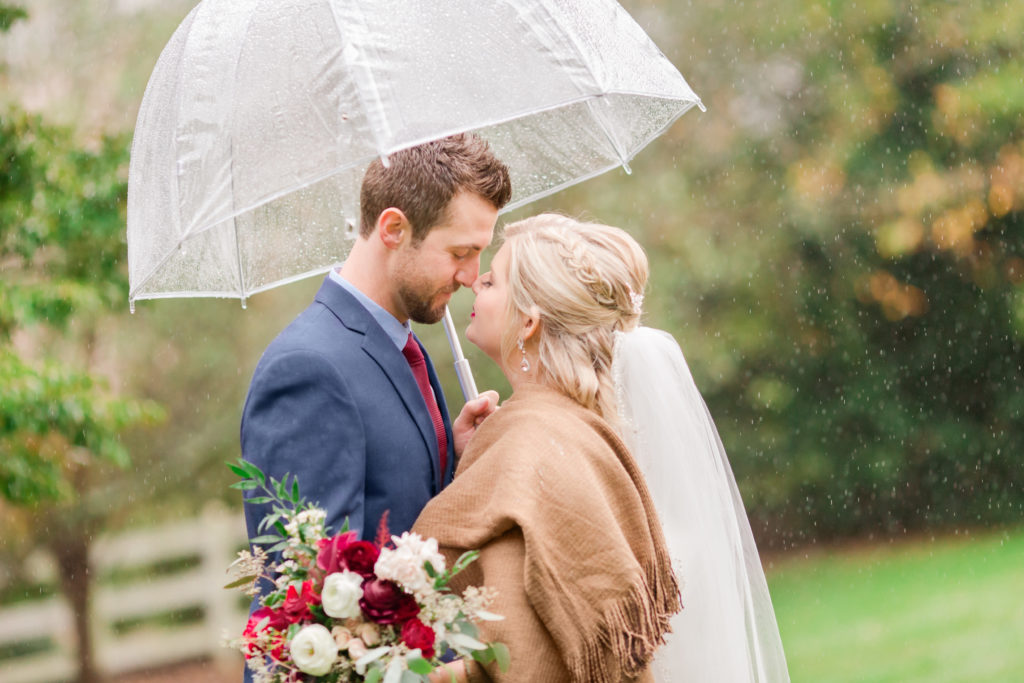
WHAT DO YOU RECOMMEND FOR A BRIDE TO PREPARE FOR POSSIBLE RAIN? – SARAH
First of all, learn to embrace it! While we hope that the weather on your day will be perfect, we love to get creative if it does in fact rain. We will find some cute porches, covered alleys or use umbrellas!! They make for some awesome shots!! Always plan for 100% chance of rain! While you are searching for a wedding venue, make sure they have a backup plan just in case of rain! You could even have some cute umbrellas for you and your bridal party! Also, be practical when it comes to your hair and makeup! You can still look absolutely fabulous and your makeup or hair artist can use waterproof makeup or a trendy hairstyle that won’t fall apart in the rain or wind. Ultimately, remember that rain can be memorable! No matter what, your wedding day will be 100% special!
WHEN IT COMES TO WEDDING PLANNING AND KEEPING A BUDGET, WHAT SORT OF DETAILS HAVE YOU SEEN TO BE THE MOST IMPORTANT TO INVEST IN?- HANNAH
The average wedding these days is around anywhere from 15,000-20,000! Yes, it’s definitely a lot!! The cost of a wedding usually comes in with the food and vendors. You can save by cutting the guest list. It isn’t an easy task, but it is possible and this will help with the cost. We have seen several of our couples have beautiful weddings with a small budget. When we were planning our wedding we had to set priorities and we found that the one thing we cared about the most was photography. It is the one thing that will last the longest after your wedding day. Your photos will be all you have to remember the story of your special day. Yes, I(Amanda) would have loved certain things such as the Chivari chairs! Oh my goodness are they gorgeous! However, they were SO expensive! I ultimately settled for the white plastic chairs because I felt it was more important to invest in photography. After you decide on the most important thing, what is the second most important thing to you? It will be just a process of give and take when setting your priorities. For instance, if the wedding venue is also important to you, then you can choose other options that might help with cost such as having a weekday wedding instead of a weekend one. Just decide what matters most to you, then write those priorities down and hold yourself accountable!
WHAT IS THE BEST TIMELINE TO HAVE WHEN IT COMES TO CONTACTING PHOTOGRAPHERS?-EMILY
We recommend booking at least 1 year in advance. You don’t want to wait until a couple of months before your wedding! Not only are most photographers going to be booked for most dates, but it could also add more stress to the planning process. So, if you are planning a June 2020 wedding, we would start researching and inquiring this spring.
HOW MANY MONTHS BEFORE THE WEDDING SHOULD WE DO THE ENGAGEMENT SESSION?-RENEE
We always tell our brides that at least 2-3 months before the wedding is good! However, if you can schedule it sooner, that’s always good, especially if you plan on using some images with your save the dates or invitations.
IT DIDN’T TAKE ME LONG TO FIGURE OUT HOW OVERWHELMING WEDDING PLANNING IS. SO, HOW SHOULD A BRIDE BEGIN TO PLAN AND SORT THROUGH ALL OF HER IDEAS?-BETH
Start your process by figuring out the colors and the theme that you would love to have! We decided on rustic and once we did it made things so much easier! Pinterest is a great option for pinning your favorite ideas!! However, don’t go overboard! You don’t want over 300 pins because you will never be able to go through all of that! Choose your favorite 20-30 pins! Another option is to hire a coordinator that takes care of a lot of things for you!! It can be a lifesaver that will make things less stressful!!
1. WHAT IS YOUR FAVORITE LENS? 2. HOW DO YOU GET SHARP PICTURES OF THE SUBJECT WITH A BLURRY BACKGROUND? 3. DO YOU KEEP YOUR CAMERA ON MANUAL MODE AND IF SO WHAT’S YOUR FAVORITE SETTINGS YOU USE? 4. WHAT TYPE OF LIGHTING BESIDES NATURAL DO YOU RECOMMEND? 5. IF THERE’S 3 MOST IMPORTANT TIPS YOU COULD GIVE A NEWLY LEARNING PHOTOGRAPHER WHAT WOULD THOSE 3 THINGS BE?-BRITTA
We love all of the questions!! 🙂
Question 1: Our favorite lens is the 85mm 1.4! We just love how it produces the creamy (or blurry) backgrounds. Question 2: In order to achieve the blurry or creamy background (known as bokeh) it all has to do with three things: aperture, the focal length of the lens, and distance. Using a wider aperture or smaller f-number (such as 1.2, 1.4) creates more blur in the background of your photos! The second factor is the focal length of the lens. The cool thing with longer focal length lenses is that they can isolate anything you can’t get close to. The other advantage is that you don’t need a large aperture, an aperture of f/6.3, for example, will give you creamy backgrounds. The third factor is distance. Try to lift your thumb in front of your right eye and stare at it while closing your left eye. If you focus on your thumb, you will notice that the background is blurry. If you move your thumb farther away while still staring at your thumb you will notice that the background isn’t as blurry anymore. This works the same with your camera. The closer your subject, the more blurred the background will be. Greater distance between your subject and the background also increases blur. Question 3: We use manual mode all the time! We think it is really important to learn to use manual mode! This will give you a lot of control in a lot of situations!! We really love to use wider apertures most of the time since it will give us beautiful blurry backgrounds and lighter images. As far as shutter speed and ISO, they have to be set according to the lighting situation and aperture you are at. We also like to shoot with Kelvin white balance since it gives you more control as well and tends to be more accurate than the default white balances. Question 4: We always prefer natural lighting! It gives us the light and airy look that we love so much!! When we are indoors we try to look for natural window light and we will turn off any lights since they tend to give an orange color cast to your subjects! We never really use any kind of artificial light when we are shooting outdoors during weddings or sessions. However, we will use flash and off camera flash during receptions. Question 5: Tip 1: Be sure to learn manual mode and to shoot in RAW!! Those are a couple of the most important things! This way you have more control when it comes to shooting and editing! Tip 2: Practice, practice practice! Shoot everything! If it moves photograph it if it doesn’t move photograph it! LOL The more photos you take the more you will learn! Tip 3: Experiment with different camera settings to find the right style for you! For example, shoot with both wide apertures and narrow apertures! Overall, enjoy the learning process! Know that you will mess up, but the mistakes will lead to understanding how to shoot better images!
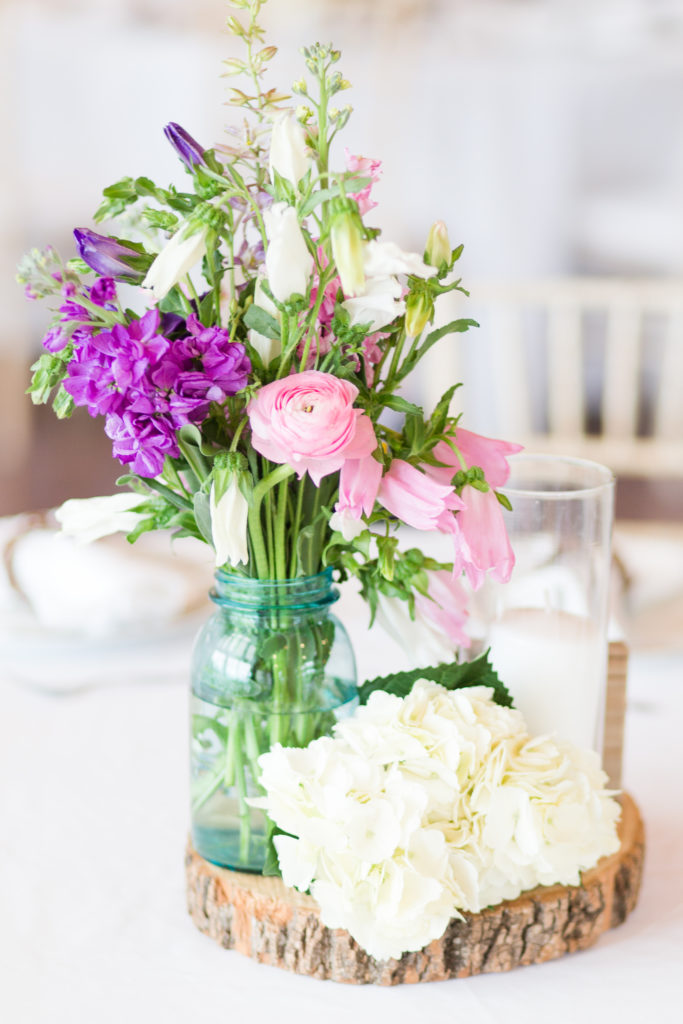
DO YOU HAVE ANY TIPS FOR STYLING DETAILS AND INVITATIONS? YOU ROCK THEM! -KATY
Thank you so much!! We have to say that if it weren’t for Katelyn James and her tips, we wouldn’t shoot details the way that we do! We learned all we know from her! One of the things we always try to do with every wedding is plan ahead. We ask in our questionnaire about the colors of their day, the theme, and details they will be having so that we can get creative ideas flowing! When the wedding day finally arrives, it’s important to find a connection you can have in the majority of the detail photos! This can be anything from an actual detail, a color, or a texture such as lace or wood. We always try to find at least one connection so that it pulls all of the detail photos together. This also helps when it comes to designing the album because it creates a consistent look! Remember though, don’t go overboard. One thing you don’t want to do is have too many things in one shot. At that point, it will just look cluttered and you always want the focal point to be clear. The fewer distractions the better. The invitation shot is all about the framing and spacing as well! You want the spacing between the different parts of the invitation suite to be even or it will take away from the overall shot.
When it comes to detail photos of the reception we try to shoot the full room and then focus on the smaller details. We always remove things like the salt and pepper shakers or butter and sugar packets since those can be distracting and unflattering. Composition and framing is essential when it comes to focus and we personally try to crop out anything in the background that may take away from the shot (such as a tray, or something extremely colorful). The simpler the background the better. Overall, find that connection point throughout the bridal details, don’t clutter the image with too many details, remove anything unflattering and keep the background simple so that it doesn’t take away from the photo!

WHEN DO YOU THINK WOULD BE A GOOD TIME TO HAVE THE CEREMONY WHEN IT COMES TO LIGHTING? -TARA
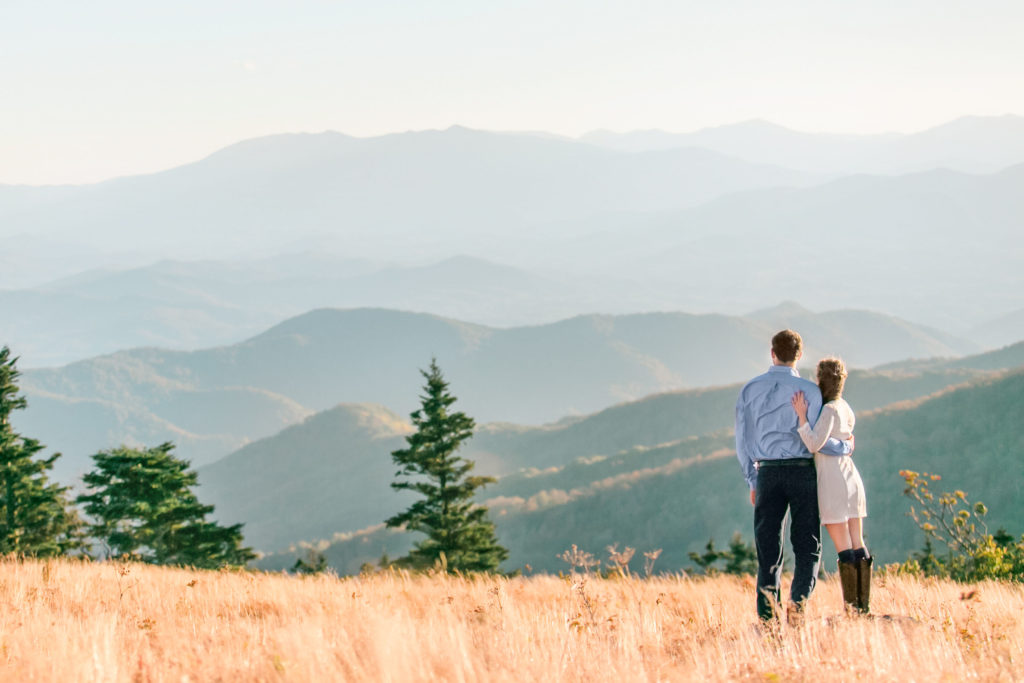
First, you really want the best light for your portraits! The golden hour is the last sixty to ninety minutes before the sun sets! You want to at least take some of your bride and groom photos during this time! If you do a First Look, most of your photos will be able to take place before the ceremony. This includes bridal party portraits and some family and bride and groom portraits. With the First Look, your ceremony can be a bit later while still allowing time to capture portraits during the Golden Hour. However, if you choose to not have a First Look, we strongly recommend that you schedule your ceremony at least 2.5 hours before sunset to allow ample time for family, bridal party, and bride and groom portraits afterwards in order to have enough light.
WHEN DO YOU FIND THE TIME TO HEAD OVER TO THE RECEPTION AND PHOTOGRAPH ALL OF THE DETAILS BEFORE ALL OF THE GUESTS ARRIVE?-JESSICA


Amanda and Chad- these are some amazing questions and such helpful answers!! Thank you so much for answering them! Love it!